To obtain this information boot into OSX and click the Apple Logo, located at the very top left, and select the menu item "About this Mac". It will tell you the memory and basic info on the processor chip.
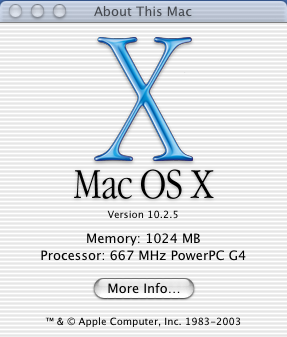
Figure 1. About This Mac
Author: Michael Lake
First version: 1st November 2003
This version: 1st January 2003
This page can be found somewhere at: http://www.speleonics.com.au/mikes/
| Referenced files: | kernel_configs.html xf86_configs.html |
1. Gather Hardware Information
2. Partition the Disk & Install Mac OS X
Under Mac OS X
3. Copy Linux Boot Files into the Debian Partition
4. Enable the root Login in OS X
5. Check the Partition Table and Save a Copy
Under Debian GNU/Linux
7. Install the BenH Kernel for Ti PowerBook
8. Install the Xserver for Ti PowerBook
Installing Other Packages
Under OS X
Once we have OS X installed we will copy some Debian Linux boot files into the
Debian partitions (it's formatted as Apple's HFS+ at this stage so we can copy
them across under OS X), we enable root login, and we make a printout or copy
the partition table information so we can refer to it while installing Linux.
Then we install Debian Linux by booting from those Linux boot files on the hard disk. Its a pretty standard install of Linux but we do have to take care when using Debians partitioning tool :-). After the full Linux OS is installed there are some important things to still do.
Under Linux
A new kernel, often referred to as the BenH kernel, needs to be installed because
under the standard kernel the PowerBook gets too hot. You dont want to run for too
long under the standard kernel. Then we can leisurely install X and other packages.
You need to know exactly what hardware you have, particularly the hard disk size (needed for when you are partitioning) and the graphics card (for setting up XFree). Also useful is the total memory (for kernel parameters).
To obtain this information boot into OSX and click the Apple Logo, located at the very top left, and select the menu item "About this Mac". It will tell you the memory and basic info on the processor chip. |
Figure 1. About This Mac |
We require more information so now click "More info". This will start the "Apple System profiler" application. You can also start the Apple System Profiler utility directly, it's located in the Utilities folder. Select the "Devices and Volumes" tab.
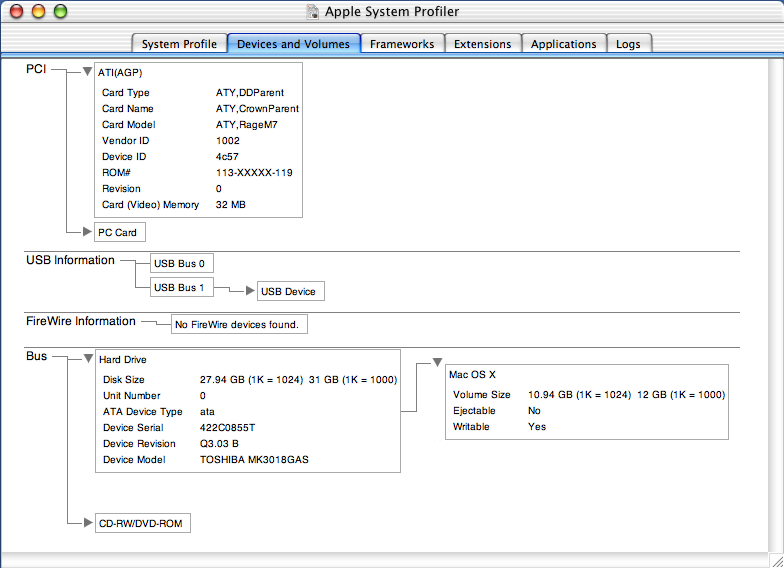
Figure 2. Devices and Volumes:
You may have to click the gray arrow next to ATI(AGP) to expand this item.
The information that we want to know is the graphics card model, in this case an
ATY, Rage M7 and the hard disk size, here 30GBytes. |
Note: The Apple System Profiler utility says the graphics card model is a "Rage M7" but in the booklet that came with the machine "Getting Started With Your PowerBook G4" the specifications there state that the Graphics controller is an "ATI Mobility Radeon 7500".
Note 2: The Apple System Profiler utility will also tell you other information that you shoudl write down in case your machine is stolen. Under the "System Profile" tab and under "Hardware Overview" you will see your customer serial number. Under "Network Overview" / "Built-in" you will find "Ethernet address". This is the hardware address of the ethernet card in your machine. This is unique to your machine and may enable it to be recovered or enable you to prove that you owned it.
Next we need to know the display resolution for when we get around to setting up X. Under the Apple Menu open "System Preferences". Under the "Hardware" section click on "Displays". The display resolutions that the LCD is capable of will be listed. On my machine the best one listed, and the one that Mac OSX normally runs in, is 1280x854.
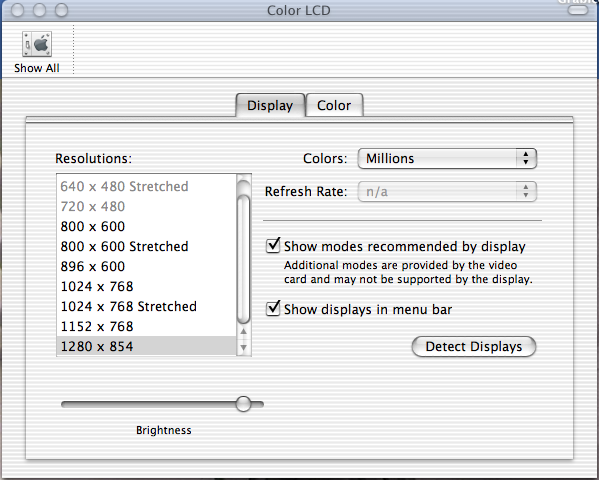 Figure 3. Displays: |
Here is a summary of the information that we will need.
Processor: 667 MHz PowerPC G4
Memory: 1024 MB
Hard disk: 30GB
Video card: ATI Rage M7
Display resolution: 1280x854
Before we proceed further we have to partition the disk so that OS X gets installed onto only a part of the disk and space is left to install Debian later on.
From the menu at the top select the "Installer / Open Disk Utility".
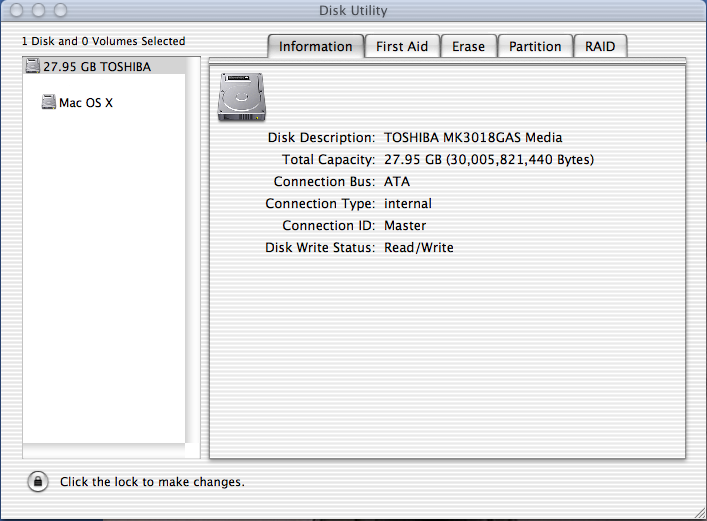

To the left of the tabs is a list of disks. This will tell us the disk size. In my case the disk was listed as "27.95 GB TOSHIBA". At this stage you will have to decide how much space to allocate to Debian and how much to leave for OS X. I decided that I would like to use about 10 GB for Mac OS X which would leave about 17 GB for Debian.
Open the drop down menu box under "Volume Scheme" and select the number of partitions you require. In this case I selected 2 (Debian and OS X partitions). The partition screen will now show two regions. The order that we want the partitions in is Debian then OS X.
Click on the 1st partition region.
Give it the name: Debian
Set the size to: 17 GB
Leave the format as "Mac OS Extended". (we want the partition to be visible to OS X so we can copy across some boot files later on.)
Click on the 2nd partition region.
Give it the name: Mac OS X
Leave the format as "Mac OS Extended".
Set the size to:
(You dont have to set anything as it will be automatically resized. With the size of the Debian partition already set the OSX partition was automatically allocated 9.49 GB.)
Don't worry if the partitioning software slightly changes the values. It will do a bit of rounding up or down to accomodate the disk block sizes and to fit the partitions into the avalable disk space.
You should now have a partitioning scheme that looks like the following:
|
Under "Options" make sure that "Install Mac OS 9 drivers" is unchecked. As we won't be installing OS 9 we dont want these. If it's checked the installation will create extra partitions to hold these drivers.
Click on the <Partition> button. A warning message will appear.
Click on <Partition> again. This will create the partitions.
Close the Disk Utility program by bringing down the Disk Utility menu and selecting Quit or just press the Command + Q key combination. This will return you to the Mac OS X Installer program.
Click <Continue>The installer will ask you to "Select a destination disk to install the Mac OS X software". There will be the two partitions that you created above.
Click through the Readme
Click through the License Agreement
You will eventually get to the "Select Destination" stage.
From this point onwards it's a standard Mac OS X install.
I opted for a custom install. Here are a few notes about my installation.
Click <Install> The install will start and this will take about 20 minutes. At the conclusion of the installation the computer will automatically reboot and startup from the hard drive.
Once the computer has rebooted it will automatically startup with the Mac Install program again but this time it will be at the "Additional Software" stage. It will ask for CD number 2 and from that it will install Applications. This will take about 10-15 minutes. After this just answer the remaining questions. After this you should have a Mac OS X system up and running.
Note: The first user that you create in OS X will have Administrator privileges. Therefore make the first user "admin" (or some other name). The next user can be a login for yourself without admin privileges i.e. a normal user account.
There are only two steps left to do while in OS X as the admin user;
These are the boot files that will on the Debian Install CD 1 but to get them into the Debian partition we need to first copy them into Mac OS X and them move them to the Debian partition.linux root.bin yaboot yaboot.conf
They can be found on the Debian Install CD number 1 or at the following URL:
http://www.debian.org/debian/dists/woody/main/disks-powerpc/current/new-powermac/
Insert the Debian Install CD 1.
Note: if you double-click the CD icon to open a Finder window and look for
these files the finder
will not show you the yaboot or root.bin files! Use the command line from a
terminal to copy the files.
In the directory:
/Volumes/Debian:PowerPC_woody//dists/woody/main/disks-powerpc/3.0.23-2002-05-21/powermac/
Copy the following files to the Desktop:
2916073 May 16  2002 linux.bin           <-- copy this to the Desktop
 150020 Dec 13  2001 yaboot              <-- copy this to the Desktop
    374 May 16  2002 yaboot.conf         <-- copy this to the Desktop
1474560 May 16  2002 root.bin            <-- copy this to the Desktop
and from the directory:
% cd /Volumes/Debian:PowerPC_woody//dists/woody/main/disks-powerpc/
      3.0.23-2002-05-21/powermac/
     /Volumes/Debian:PowerPC_woody//dists/woody/main/disks-powerpc/
      3.0.23-2002-05-21/powermac/images-1.44/


% cp linux.bin yaboot yaboot.conf ~/Desktop
To get them onto the Debian volume just open up a finder window and locate the hard disk icon named "Debian". This is the Debian partition - it will be visible to the finder as it's still an Apple partition of type HFS+. Double click on this icon to open it then drag the files from the Desktop into this folder. They will be copied onto the partition.
The easiest way to enable root is to logon as the admin user, start a terminal session, and type:
admin% sudo passwd root
Password:                 <-- enter your Admin password
New password:             <-- enter the password you want to use for root
Retype new password:      <-- reenter this password
admin %
Logon as the admin user, start a terminal session, then su to root:
admin% cd Desktop
admin% su root
# pdisk /dev/rdisk0 -dump > partition_table.txt
# chown admin:staff partition_table.txt
# cat partition_table.txt

/dev/rdisk0  map block size=512
   #:                 type name                 length   base     ( size )
   1:  Apple_partition_map Apple                    63 @ 1
   2:            Apple_HFS Debian             34568160 @ 64       ( 16.5G)
   3:            Apple_HFS MS DOS              1048576 @ 34568224 (512.0M)
   4:            Apple_HFS Mac OS X           22988312 @ 35616800 ( 11.0G)
   5:           Apple_Free                           0+@ 58605112

Device block size=512, Number of Blocks=58605120
DeviceType=0x0, DeviceId=0x0
It's now time to restart the computer. Shutdown the computer but restart it as in the next section.
Apple PowerBook3,4 4.3.7f3 BootROM built on 04/17/03
Copyright 1994-2002 Apple Computer Inc.
All rights reserved.

Welcome to Open Firmware, the system time and date is 06:12:06 11/08/203
To continue booting, type "mac-boot" and press return.
To shut down, type "shut-down" and press return.

O>
We now tell the Open Firmware to boot the computer using the yaboot boot image on partition 2.
0> boot hd:2,yaboot
This should start up the yaboot loader program. You should see the following:
Enter 'install' to boot the installer or 'install safe' if you have problems booting.

Welcome to yaboot version 1.3.6
Enter "help" to get some basic usage information.
WARNING: Bootstrap partition type is wrong: "Apple_HFS"
type should be "Apple_Bootstrap"

boot:
This "boot: " prompt only remains for a few seconds. If you don't do anything it will automatically start the install. If instead you type help immediately you see "boot: " then it show a few lines of help and then it will remain there waiting for you to tell it to install. Doing this means that you can find out a few other things from the boot: prompt. For instance, if you hit the tab key you will see a list of the defined images to boot. If you didn't catch the boot: prompt and it boots into the default install just turn off the Apple and reboot into open firmware again. This time be quicker :-)
From this boot: prompt you can hit the tab key and you will be presented with a few boot options:
*install install24 install-safe install24-safe
The default is marked with an *; rather than selecting that type
install24
You should see a nice penguin and a linux kernel booting up on a black background.
Once the Linux kernel has booted it will automatically enter into the Debian
Installation
program. Just follow the instructions for the distribution. This will install the
2.4.18-newpmac kernel.
Note: If you see a light background with a symbol looking like a circle
and a diagonal line that means that you have chosen the wrong number for the
partition to boot from. Have a look at the partition table again to see where
you have gone wrong.
Configure the keyboard
Here is the partition map that we saved earlier when we used the pdisk command.
The three current HFS partitions correspond to the three partitions on the left
side of the figure.
To do this partitioning we have to use the Debian PPC partition editor! As we
do this the screen will look like the following. I have shown everything that
you would enter in bold face.
We type 'd' to delete a partition.
It will ask for the partition number and we enter 2. Note that the swap partition must be called 'swap' and the root partition must
be called 'root'.
When you are given the warning about writing the partition table answer yes.
The next step of the installlation will ask you to initialize and activate a
swap partition. It will automatically identify /dev/hda3 as the swap
partition. Answer yes to the question. It will then ask to inirialize the
Linux partition. I choose an ext3 type rather than the ext2 type.
Mount root filesystem 1. When the option appears for running "tasksel" and " deselect"
select "No". Instead of the installation
installing hundreds of applications that you will never use you will end up with a
minimal Debian system. It's so easy to apt-get install things that you actually want
later on.
Reboot the system
/etc/resolve.conf
sources.list
apt-get install sudo
Edit the sudo file with "visudo".
You will need to install a new kernel. Before we do that though we need to install
packages that a kernel compile will require and setup the system so that a normal
user can compile a kernel package.
Add yourself to the src group. Edit /etc/group and append your login name to the
the line starting with src.
Now install the kernel-package:
"apt-get install kernel-package".
# apt-get install gcc make libncurses5-dev
This provides the script make-kpkg. Once that is installed its a breeze
to build a new kernel.
apt-get install kernel-source-2.4.6-test9
It's called 2.4.20-rc1-ben0 and is
available here: http://penguinppc.org/~benh/
or you can rsync it down using: This will create a kernel using BenH's default .config file
# dpkg -i "kernel name"
It will automatically setup a symlink /vmlinux -> /boot/vmlinux-2.4 etc
DONT need to do this unless you change yaboot.conf
Don't forget to run the ybin program as root to write the yaboot
configuration file to the hard disk.
Now the test time. At your login prompt type "startx" and X
should start up with the TWM window manager.
Add this line to your sources.list for getting the DRI trunk of the XFree86:
then "apt-get install xserver-xfree86-dri-trunk"
This will also remove the xlibmesa3 package and
replace it with xlibmesa3-dri-trunk.
Now that that is installed (don't worry it will install perfectly)
you will need to manually install an XF86Config-4 file for a TiPowerBook.
There are probably quite a few that you can find on the Web.
Craige McWhirter
McWhirter XF86Config-4
XF86Config-4 files Configuring XFree 86
Partition the Hard Disk for Debian
Remember that first partition that was created on the drive, the Debian partition that
was in Apple HFS+ format. That partition will now be subdivided into an Apple partition required for booting and our Linux partions, swap and root.
A graphical representation of what we are going to do is shown in the figure below.
TODO - image

The Debian partition (which is Apple HFS+) will be deleted
and in its place three new partitions will created. An Apple one for booting,
the Linux swap and the main Linux root partition.
            Type                  Name                System
/dev/hda1   Apple_partition_map   Apple      31.5 k   Partition map
        2   Apple_HFS             Debian     16.5 G   HFS
        3   Apple_HFS             MS DOS     512 MB   HFS
        4   Apple_HFS             Mac OS X   11.0 G   HFS
        5   Apple_Free                        4.0 k   Free space
You will see below that I often type p to print the partition table to check
that what you did is what you expected
(I have only shown the partition number that is changed).
Type 'c' to change a partition.
d
   Partition number: 2
p
   2   Apple_Free   Extra   16.5 G   Free space
b
   First block: 2p
p
   2   Apple_Bootstrap   bootstrap   800.0 k   New World bootblock
c
   First block: 3p
   Length (in blocks, kB(k), MB(M), GB(G)): 1G
   Name of partition: swap
p
   /dev/hda3   Apple_UNIX_SRV2   swap   (1.0G)   Linux swap
c
   First block: 4p
   Length (in blocks, kB(k), MB(M), GB(G)): 4p
   Name of partition: root
p
   /dev/hda4   Apple_UNIX_SRV2   root   (15.5G)   Linux native
w
   Write partition map? [n/y]: y
q
Initialize and Activate a swap Partition
Install kernel and driver modules
Configure device driver modules
Notes on my installation follow.
Edit yaboot.conf to allow Booting into OS X
Edit /etc/yaboot.conf and insert two extra lines as shown below.
Don't forget to run the ybin program as root to write the yaboot
configuration file to the hard disk.
defaultos=macosx
macosx=/dev/hda6

? image=/boot/vmlinux
? label=linux


# ybin
search 138.25.82.1
search 138.25.82.8
apt-get update
apt-get upgrade
# sudoers file.
#
# This file MUST be edited with the 'visudo' command as root.
#
# See the man page for details on how to write a sudoers file.

# Host alias specification

# User alias specification

# Cmnd alias specification

# User privilege specification
mikel   martel=NOPASSWD: /usr/bin/apt-get
mikel   martel=NOPASSWD: /usr/bin/make-kpkg
Install the BenH Kernel for Ti PowerBook
src:x:40:          <-- before

src:x:40:mikel     <-- after
rsync -avz rsync.penguinppc.org::linux-2.4-benh /usr/src/benh_kernel
  $ make-kpkg clean
  $ make-kpkg --revision=custom1.0 kernel-image
kernel config files
# ybin
apt-get install libcurses5-dev
                make
                gcc
Install the Xserver for Ti PowerBook
deb http://people.debian.org/~daenzer/dri-trunk/ ./
Craige McWhirter
Jeb Bolding
Minimal
apt-get install xutils mdetect
apt-get install x-window-system  (this supplies the startx script and lots of other things)
ati
PCI:0:16:0
xkbd rule set:	xfree86
keyboard:
keyboard layout;
mouse:
LCD:		yes
monitor:	medium
			1152 x 864 @ 75 Hz
            also added
			800 x 600
			640 x 480
depth:		24
Getting Keys to Emulate the 2nd and 3rd Mouse Buttons
Here is how to setup your laptop to make the function keys F11 and F12 emulate
the middle and right hand buttons of a mouse. This is really essential when your doing
work/play on a train and you dont have your 3-button mouse.
Logon as root and issue the following commands:
echo "1"  > /proc/sys/dev/mac_hid/mouse_button_emulation
echo "87" > /proc/sys/dev/mac_hid/mouse_button2_keycode # F11
echo "88" > /proc/sys/dev/mac_hid/mouse_button3_keycode # F12
To make these changes permanent put the three 'echo' commands at the end of the
file /sbin/init.d/boot.local which is executed at system startup.
*How can I get three mouse buttons under X?*
If typing Option-2 and Option-3 for the middle and right
mouse buttons respectively annoys you (these are the
defaults, and yes I hate them), you can use xmodmap
to change this. Edit your startx file to have the
following line:
serverargs="-nooptionmouse -middlekey 128 -rightkey 130"
Your middle and right mouse buttons will be mapped to
F1 and F2, respectively. Do "man xmodmap" for more details.
Installing Other Packages
Finally one can install other useful packages such as:
dpkg-www
eject				For ejecting CDs
enlightenment
  e16keyedit
  e16menuedit
  epplets
mozilla-browser
synaptic			Front end for apt-get
wget
vsftpd
ftp
hfsplus